Tuesday 26 March 2013

Cheeseburger Macaroni Bake


Ingredients:
245g (just over 8.5 oz.) Beef mince (ground beef)

¼ of a small onion (diced)

1 clove of garlic (diced)

a few dashes of Worcestershire sauce

200g (7 oz.) of macaroni

3 Tbsp. of diced pimentos

150g (just over 5 oz.) of full fat cream cheese

1 Tbsp. of French’s yellow mustard

90g (just over 3 oz.) of grated cheddar + an additional handful or 2

300ml (just over 10 oz.) of milk

dash of cracked black pepper

18 Ritz crackers (blitzed or crushed)

a medium-sized casserole dish


I needed to use up some pimentos from a large jar I’d opened to make Yellow Jack Chicken & wanted to do something involving pasta & cheese.  My 7 year old son & I discussed what we’d like for dinner & came up with this recipe together.  The whole idea is that it’s like a deconstructed cheeseburger in a casserole, with the pimentos evoking both pickles & grilled peppers & the cracker crumbs representing the bun.  You’ve got the onions, the meat, the mustard – the whole works & pasta to boot!  I think it’s pretty good, so please enjoy.


Method:

In a non-stick pan, soften the onions & garlic & add the mince (ground beef).  Add a few dashes of Worcestershire sauce & cook until brown.  While this is going on, you can be boiling 
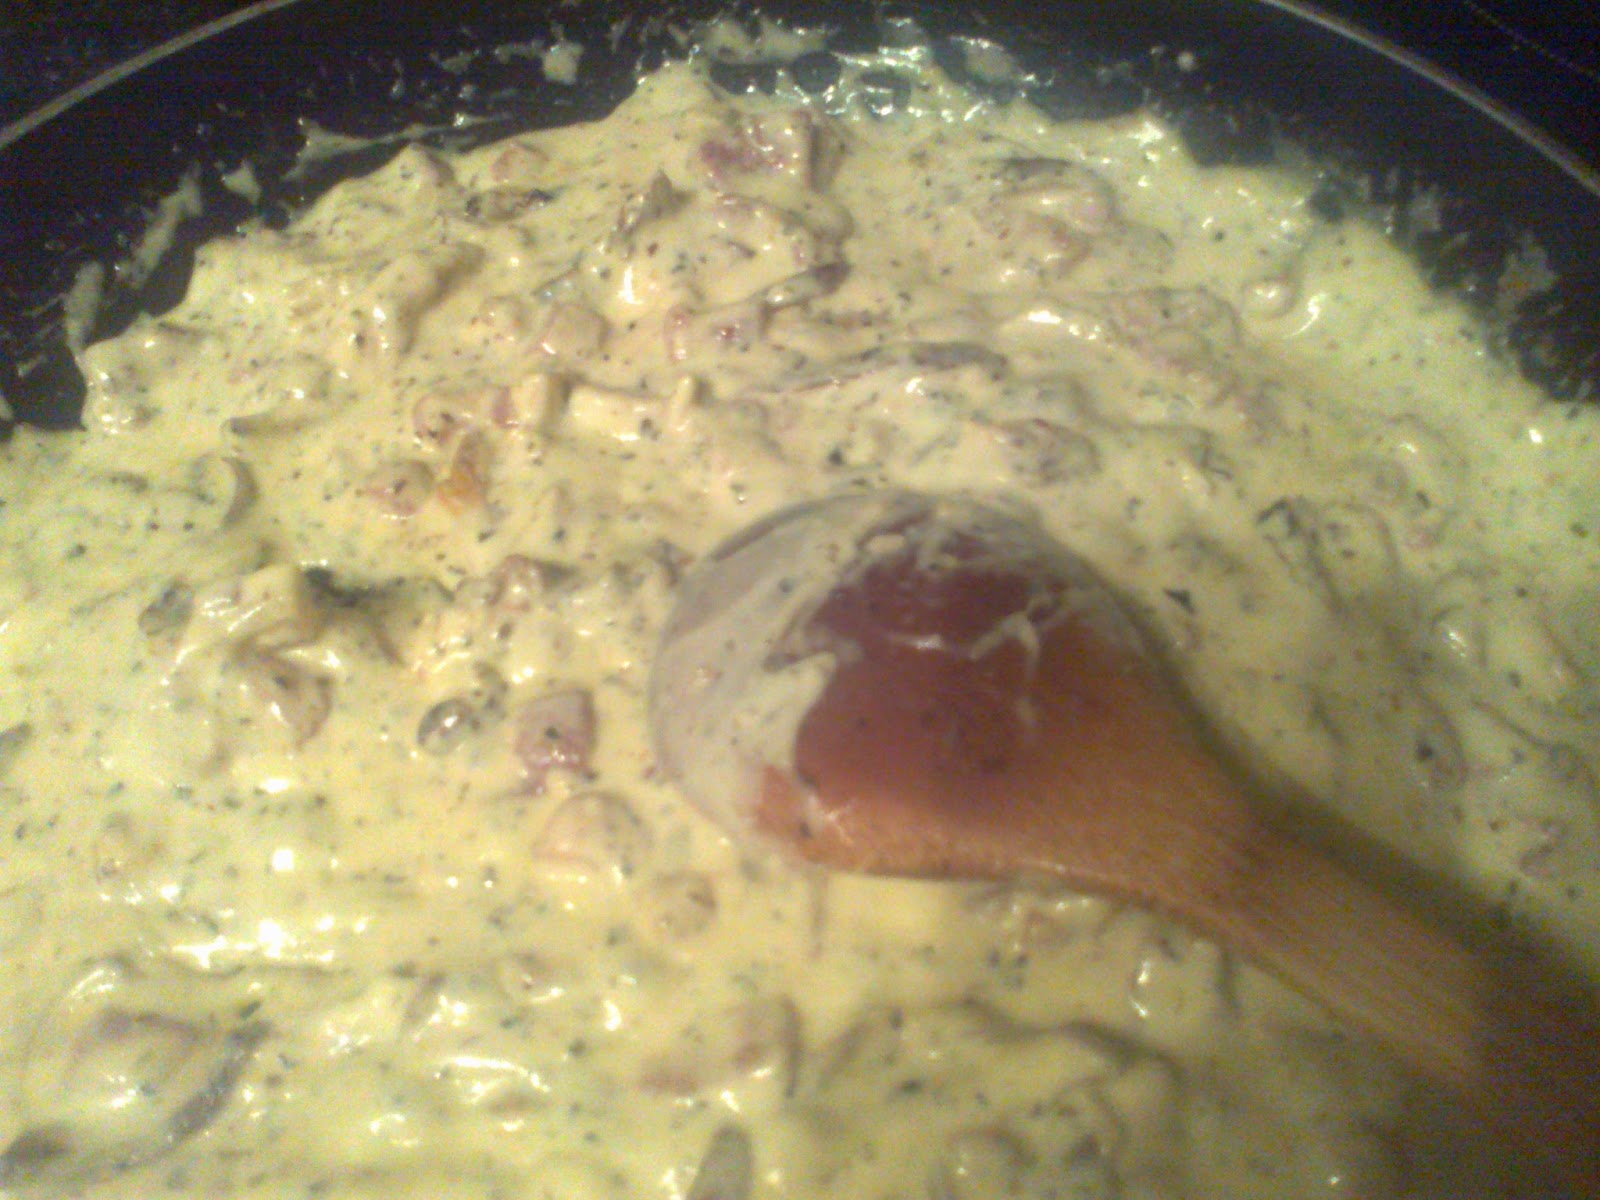
the macaroni.  Boil until al dente, then drain & set aside.  To make the ‘instant’ cheese sauce, melt the cream cheese & milk in a small pot.  When the cream cheese is melted in & it has formed a thick liquid, add the mustard, black pepper & grated cheddar & stir until smooth & blended.  Taste a little of the sauce on your finger & see whether you think it needs a dash of salt.  I find this sauce to be more than flavourful, but my husband always feels the dish needs a little salt when I use this sauce.  Everyone’s tastebuds are different & I’m not a fan of salt, so you may feel differently.  (You may notice from my blog that this is the same cheese sauce I use when making a vegetable bake.  It’s quicker than a traditional cheese sauce with a roux base, which I also use frequently, & simply works better with certain things.  You may also notice that I tend to use yellow American hotdog mustard in my cheese or cream-based sauces.  It’s something I discovered many years ago when playing around with flavours.  A little goes a long way toward making something zippy & more flavourful & I find it preferable to using tons of salt.)  In a casserole dish, combine the cooked mince & onion mixture with the macaroni & the pimentos, then stir around until well mixed.  Pour over the cheese sauce & stir a little until well-covered.  Sprinkle a handful or 2 of grated cheddar over the top.  Next, crush the Ritz crackers with a mortar & pestle or in a food processor & sprinkle over the top.  Bake at 200 Celsius (390 F) for about 35 minutes until bubbly & golden brown.

 
before the oven
out of the oven
our 'deconstructed cheeseburger' with roasted butternut squash & sweet potato with pumpkin seeds 

Saturday 23 March 2013

Yellow Jack Chicken

Ingredients:
6 skinless/boneless chicken breast fillets
250ml (8.4 oz.) of good quality chicken stock
160ml (5.4 oz.) double (heavy) cream
a 150g ball (just over 5 oz.) of real mozzarella
100g (3.5 oz.) grated cheddar & mozzarella mix
1 small jar of pimentos (in the States) or 1 to 2 whole ones chopped (Ireland)
4 Tbsp. French's yellow mustard
5 Tbsp. water
1 Tbsp. dried mixed herbs
1 tsp. Worcestershire sauce
1/2 tsp. paprika
1/2 tsp. granulated garlic
1/4 tsp. onion granules or onion salt 
dash of cracked black pepper
A large casserole dish

I threw this together one night about a decade ago after being inspired by someone describing a lovely dish they'd had that involved stock & cream with chicken.  I just sort of went with things I had in the press & ended up with something unique & different that I thought would taste nice.  It's never failed to impress at dinner parties & people have even been known to fight over who gets to mop up the last bit of sauce with their bread!  Even when the chicken is all gone after the leftovers, I often like to have some of the cheesy mustardy pimento-filled sauce over a piece of toast for lunch.  One thing I will say is that if you're scared of dairy or calories, look away now - this dish is not for you!  It's a little like a cooked version of pimento cheese (Americans will know what this is!) & chicken together.  Its name originated from the yellow mustard I use in it & the fact that I originally used Monterrey Jack cheese.  There was a supermarket near us that sold imported Monterrey Jack for a couple of years, but it stopped being available here years ago.  I replaced the Monterrey Jack with a combination of real milky mozzarella & grated cheddar & mozzarella mix.  It makes for lovely gooey cheesy bits in the sauce.  If you're in the States, feel free to use the original Monterrey Jack though - it's gorgeous both ways!

Method:
Place your 6 breast fillets in a large casserole dish.  Make a glaze using the yellow mustard, water, Worcestershire sauce, dried mixed herbs, paprika, pepper & granulated garlic.  I like to mix this in a glass measuring jug & then use the same jug, with the residue of the glaze still in it, to make the stock.  That way you use every bit of flavour.  When you've mixed the glaze, pour it over the chicken breasts so that they are nicely covered.  Top them with chopped up pieces of the milky mozzarella & a whole small jar of chopped pimentos (for people in the States).  For people here in Ireland, pimentos are usually called 'Papryka' in Polish shops or in the Polish aisle of your supermarket.  They're the pickled sweet red peppers that are usually sold whole or halved in a large jar .  I chop up the equivalent of 2 whole ones if they're smaller or 1 whole one if they're large.  After the pimentos go on, top with the grated cheese combo.  Then, mix up your favourite chicken stock (I use a Knorr concentrated gel stockpot - it makes 500 ml & you'll need about 250ml of it for this dish).  Pour the stock around the chicken breasts.  Next, pour the double cream into the stock - the liquid should sit pretty high up - half covering the chicken & cheese,etc.  Put uncovered into the oven at 190 Celsius (375 F) for about 45 minutes until cooked through & the cheese on top is brown & bubbly.  
This will feed 6 people or 3 people for 2 nights.  I usually serve it with steamed baby new potatoes with parsley & butter or sometimes with rice.  It's nice to serve some steamed green veg & some bread with it too (for sauce-mopping of course!).

This is a mini cutting board & I chopped up 4 halves of smaller pimento peppers.
how it should look once the glaze is poured over...
Right before the oven...
The finished dish

The sauce can look a little 'curdly.'  Don't be put off - this is just the separation of the mozzarella from the mustard, stock & cream, etc.   It tastes so yummy!

Thursday 14 March 2013

Ginger's Black Bean Soup

Ingredients:
a 500g (just over 17.5 ounces) bag of dry black turtle beans
1 & 1/2 400g (just over 14 oz.) cans of chopped tomatoes
1 small (198g or 7 oz.) can of Green Giant sweetcorn with peppers (Mexicorn)
Just over 1 pint (22 oz.) of beef stock
1/2 a large onion (diced)
3 medium carrots (diced)
2 stalks of celery (diced)
2 cloves of garlic (diced)
2 tsp. dry Cumin
2 tsp. salt
2 tsp. Nando's Medium Peri Peri sauce (or Tabasco)
1 tsp. dry Oregano
1/2 tsp. Worcestershire sauce
1/2 tsp. Hickory Liquid Smoke (optional)
A hand blender
A 4.5 litre or more slow cooker (crockpot)

I had a whole unopened bag of dry black turtle beans that needed to be used up, so I just made up this black bean soup recipe on the fly.  I adore black bean soup, but have never made my own.  We just had it for dinner and were surprised at how amazingly well it turned out.  It's a new family favourite!  This recipe makes a huge amount (my 4.5 litre slow cooker was full to the brim), so it's great for a big gathering or for freezing some for a later date. 
*Liquid smoke generally cannot be gotten in Ireland and I only occasionally get some brought over by friends from the States. If you don't have this ingredient, don't worry too much - it only adds a little extra smokiness, but the soup is still fab without it.

Method:
Firstly, you'll need to rinse your dry black beans, then soak overnight (or for at least 8 hours).  Place them in a very large bowl and cover with water until there is at least 2 or 3 inches of water above the level of the beans, as they swell quite a bit.  Put a lid or plate over them.  The next morning, drain and rinse them again and then place in a large stock pot or divide between 2 slightly smaller pots.  Put in fresh water, once again making sure there is at least 2 inches of water above the beans.  Bring to a boil, then turn down to a low simmer and leave to simmer with a lid half on for 60 to 75 minutes until tender.  Drain the beans most of the way, leaving only a few tablespoons of the liquid in them.  Pour all but 1/4 of the beans into your slow cooker (the other 1/4 will be used later).  Put the diced celery, onion, garlic and carrots into the slow cooker along with the Cumin, Oregano, Salt, Peri Peri or Tabasco, Worcestershire and Liquid Smoke.  Then, make up 22 ounces of good quality beef stock (I use a Knorr concentrated gel stockpot) and add that in, along with 1 whole can of chopped tomatoes.  Stir the mixture, place the lid on the slow cooker and place it on the low setting.  Leave this to cook for 4 or 5 hours.  After the few hours is up, blend the mixture in the slow cooker with a hand blender on a medium to high setting.  If you don't have a hand blender, you could remove the mixture by the ladle-full and blend in a food processor.  Once the mixture is blended to a fairly smooth consistency, add in the remaining 1/4 of the whole cooked beans, the small can of mexicorn and another half a can of chopped tomatoes.  If you like it to have a stronger tomato taste and more chunks, you can add in the whole can.  Stir again and allow this to cook on low for another half-hour to 1 hour and then serve with a garnish of grated cheese, sour cream and a few tortillas chips on top.  You can also have chunky bread on the side.  Now that I've made this and know how easy it is, it will definitely be a regular meal around here.  Enjoy! 

Everything in the slow cooker 
After 5 hours of cooking, some hand-blending and added ingredients...
Hearty and delicious!


Tuesday 12 March 2013

Sweet Potato Pie

Ingredients:
2 cups cooked & mashed sweet potatoes
2 medium eggs
1 & 1/4 cups evaporated milk
85g (3 oz.) white sugar
1/2 tsp. salt
1/2 tsp. ground Cinnamon
1/2 tsp. ground Nutmeg
1/4 tsp. ground Ginger
1/8 tsp. ground Cloves
1/2 tsp. lemon juice
1 tsp. Vanilla extract or essence
4 Tbsp. melted butter or margarine
1 unbaked Jus-rol shortcrust sheet
A deep 9 inch pie dish

This is a very popular dessert in our house & it's not sickly sweet.  It's very similar to pumpkin pie, but I think it's even better & you don't have to wait for that 2 month window of the year when pumpkins are available.  Since we get great sweet potatoes year round over here, I make this quite often.  It goes so quickly in our house & visiting friends & family always want to take an extra piece with them, so I usually double the recipe & make 2 pies at once.  

Method:
Preheat oven to 220 Celsius (425 F).  After you've peeled, cubed & boiled your sweet potatoes, mash them well.  Into a large bowl, put the sweet potatoes, evaporated milk, sugar, salt, cinnamon, nutmeg, ginger, cloves, lemon juice, vanilla, eggs & melted butter or margarine.  Blend by hand until smooth.  Roll out the shortcrust pastry to fit a deep 9 inch pie dish & line the dish with the pastry.  Pour the mixture into the unbaked crust.  Bake for 10 minutes in the preheated oven, then reduce the heat to 150 Celsius (300 F) & bake for about 50 minutes more or until the filling is firm.  Serve with whipped cream. 

Yum!


Posh Chicken and Noodles

Ingredients:
8 small chicken thighs (or a small/medium whole chicken)
150g (just over 5 oz.) tagliatelle or medium egg noodles
50g (1.5 oz.) pine nuts
dash dry Rosemary
dash dry Thyme
Sea Salt & Cracked Black Pepper to taste
Olive Oil
Handful of fresh Flatleaf Parsley - roughly chopped
Fresh grated Grana Padano or Parmesan to garnish

I saw Nigella Lawson make a similar dish several years ago & was inspired.  I made a few subtle changes to her recipe & came up with this.  It couldn't be simpler & is great for family members of all ages, provided nobody has a pine nut allergy.  For the sake of value for money, juiciness & flavour, I prefer to use chicken thighs, but the recipe could easily be adjusted to use a small to medium whole chicken if you prefer.

Method:
Place the chicken thighs together in a baking dish & rub with plenty of olive oil & a few dashes of sea salt & cracked black pepper.  Put a couple of tablespoons of water in the bottom of the pan & cover with foil.  Cook at 190 Celsius (375 F) for about 40 minutes before removing the foil.  Once foil is removed, cook uncovered for 30 minutes at 200 Celsius (390 F).  Remove chicken from oven & set aside to cool for handling, reserving the juices in the pan.  Cook noodles in salted water until al dente.  Lightly toast the pine nuts in a dry pan with a few dashes of sea salt & cracked black pepper.  Tear the chicken from the bone into rough shreds.  I'm not a fan of skin, but if you like skin, you can also include some of the crispier pieces with the meat.  Pour the chicken cooking juices into a large pot, turn to a low simmer & toss in the torn chicken, the toasted pine nuts, a dash each of dry Rosemary & dry Thyme & the fresh chopped Parsley.  When all of this is combined, toss in the noodles & toss around with 2 spoons in order to fully mix & coat the noodles.  Add another dash or 2 of salt & pepper & it's finished!  

This is serious comfort food.  We like to serve it with a topping of grated Grana Padano cheese, a little fresh sliced cucumber in vinaigrette & some chunky fresh French or Italian bread with a side bowl of balsamic vinaigrette for dipping.  Enjoy!


The chicken before the oven
Lightly toasted pine nuts
Ready to serve
On the plate.  Enjoy!

Sunday 10 March 2013

Ginger's Peach Gobbler Cobbler

Ingredients
1/2 cup (4 oz.) butter
820g (28 oz.) canned peaches in juice or light syrup
2 Tbsp. white sugar
1 cup self-raising (all-purpose) flour
1 cup white sugar
1/2 tsp. ground cinnamon
1/8 tsp. nutmeg
1 cup of milk
1/2 tsp. vanilla extract
2 more Tbsp. white sugar 

This a favourite dessert in our house.  I didn't have my mother's peach cobbler recipe & couldn't get any decent fresh peaches (which I knew hers required), so I looked a recipe that used tinned peaches so I could do it year round.  Over the years, I made a few changes to get it how I wanted it.   I've literally made this hundreds of times.  The prep time is mere minutes & it's so easy to do.  It's great for barbecues, get-togethers & occasions like pot luck when you're bringing something to someone's house.  It's always a huge hit & it's always gone within minutes when other people are around.  They always want the recipe, so here it finally is!

Method:
Preheat oven to 165 Celsius (325 F). Put the butter in an 8x10 or 9x9 inch baking dish & place in oven to melt while you prepare the remaining ingredients. Bring the peaches with juice & 2 tablespoons. of sugar to a boil in a saucepan. Reduce heat to medium-low & simmer for 10 minutes.  Set aside. Whisk together the flour, 1 cup sugar, cinnamon, vanilla & nutmeg in a bowl. Stir in the milk until the mixture is just moistened. Pour into the hot baking dish over the butter.  Spoon the peach slices & most, but not all, of the juice over the batter. Bake in the preheated oven for 30 minutes. Remove briefly, to sprinkle with the remaining 2 tablespoons of sugar. Return to the oven and bake until the top is golden brown - about 30 to 45 minutes longer.

This serves quite a few & is best served hot with cold vanilla ice cream on top! If you're all out of ice cream, custard makes a pretty topping too.

M-m-m-m-m!

Friday 1 March 2013

Spaghetti Supreme

Ingredients:
Approx. 250g (half a standard packet) of linguini or spaghetti of your choice
130g (just over 4.5 oz.) cubed Pancetta
1/2 a large yellow or orange bell pepper
250ml (8.5 oz) double cream (heavy cream)
600-70g (a little over 2 oz.) torn up roasted or poached chicken breast pieces
a generous handful of finely grated Grana Padano or Parmesan
Dash cracked black pepper

This is another one of those dishes I made up on the fly when I had some produce in the house that needed using up.  We couldn't believe how nice it tasted - it's the hubby's favourite pasta dish!  When you're oven-roasting the peppers, the whole house smells like pizza.  The flavour the blackened peppers imparts is key to this dish.  It's what separates it from a typical Carbonara.

Method:
After de-veining & de-seeding, slice the half a large yellow or orange pepper (or a whole small one) into long slivers, then cut those slivers into 2 shorter chunks each.  Place them in a small roasting dish with a generous drizzle of olive oil & a generous shake of dried mixed Italian herbs (Marjoram, Oregano, Basil, Thyme & Rosemary).  Roast in the oven at about 175 Celsius (350 F) for about 40 to 45 minutes until they begin to actually blacken.  They should look a little burned - this is the flavour you're going for.  Cook your diced Pancetta in a large skillet, then add in the pre-cooked chicken pieces.  To this, add the blackened peppers with herbs, the cream, the dash of cracked black pepper & a generous handful of grated Grana Padano (Parmesan will also do).  Simply simmer on a medium heat, then turn down to a lower heat & stir regularly with a wooden spoon for a few minutes while you boil your pasta.  Serve over the pasta with some more freshly grated Grana Padano sprinkled on top.  Served with salad and/or bread, this will feed 3-4 people.

peppers before the oven
and after the oven.... blackened is what you want.
before the cream
cream added - almost ready to serve...
The finished product - very satisfying.

Easy Peasy Cheezy Veg Bake

Ingredients:
113g-115g (4 oz.) frozen broccoli

290g (just over 10 oz.) frozen cauliflower
1 very large or 2 smaller carrots (sliced in rounds or half-rounds at larger end)
2 small-medium Rooster potatoes (skinned & sliced into 6 to 8 chunks each)
200ml (just over 6.5 oz.) milk
200g (7 oz.) Philadelphia Light Cream Cheese
100g  (3.5 oz.) + an extra handful of grated mature/sharp cheddar
2 tsp. dried or fresh diced chives
2 tsp. French's yellow mustard
dash cracked black pepper

I used to make a broccoli/cauliflower cheese bake on lazy nights when it was just Oscar & me.  Over the years, it's developed & changed.  He requested carrots in it & I decided to add potatoes & add chives to the cheese sauce.  It's our favourite thing to have on nights when Daddy's not here for dinner (he doesn't like broccoli or cauliflower) or just on those nights when we want a break from meat.  It's super easy & really tasty.  It's also surprisingly filling.  We have it with a salad or occasionally with ciabatta or sourdough bread.  Yum!  This is one of those dishes that is so yummy, I find myself heating another little dish of it for a late-night snack!

Method:
Place your potato chunks & carrot rounds into boiling water for 8-10 minutes or so until they are partially softened but not to the point of breaking apart.  For the last minute or so, throw the frozen broccoli & cauliflower into the water to slightly soften them as well.  Drain all the veg & place in a medium casserole or gratin dish.  For the cheese sauce, place the cream cheese & milk (best results with whole milk) into a pot on a medium heat & stir until the cream cheese melts into the milk for a thick liquid.  Add the dash of cracked black pepper, the chives, the grated cheddar & the yellow mustard.  Stir until melted to a semi-thick cheese sauce.  If you feel it's a little too thin, you could always add another blob of cream cheese or an extra handful of cheddar.  Pour over the veg, sprinkle another small handful of grated cheddar across the top & bake uncovered at 180 Celsius (356 F) for about 45 minutes until the cheese is brown & bubbling & the tougher veg like the cauliflower & potatoes have had a chance to cook through.  Using this method & timings, the veg shouldn't be totally mushy, but should still have a little bite left in them.  This will feed about 5 people, depending on portion size. 

Just before the oven
...and after...
so yummy & as easy as 1,2,3!